At 12-ID-B, we use a in-house automatic sample changer (or autosampler) for high throughput solution/bio-SAXS/WAXS measurements. The autosampler consists of three linear slides (X-, Y- and Z-) to position the samples and the sampling needle, and a 6-valves tricontinent syinge pump to drive the liquids.
A python-based software with friendly graphic user interfaces (GUI) has been developed to control the syringe pum, XYZ slides and data collection.12-ID-C runs a different autosampler but with a similar software control.
Here are the instruction on the autosampler setup and software operation.
0. AutoSampler Setup

Fig 1. The AutoSampler at 12-ID-B, running a 96-well plate.
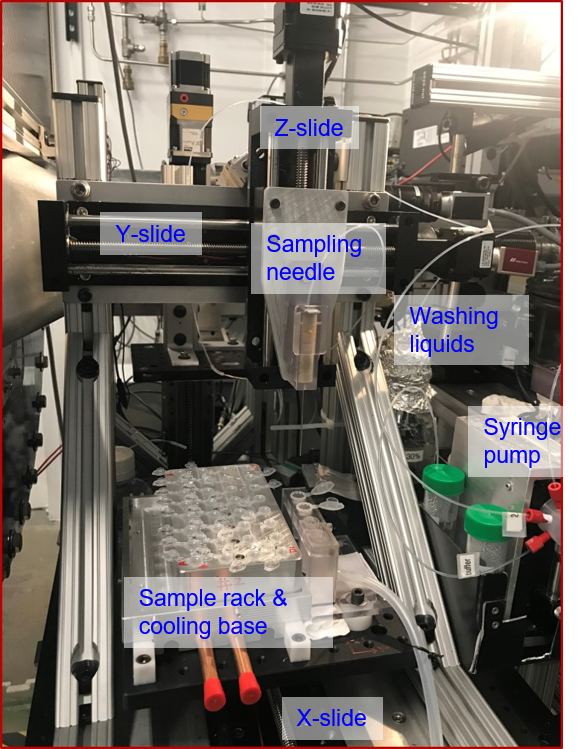
Fig 2. AutoSampler running 32-tube rack.
Autosampler:
Syringe Pump:
Quartz Capillary for Flow Cell:
Tubing length:
1. Start AutoSampler program on Purple
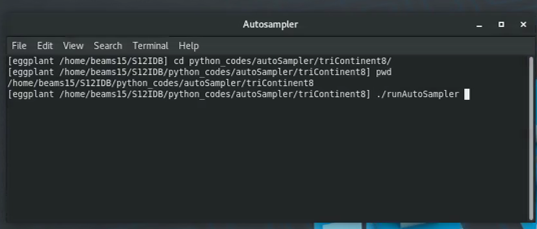
Fig 4. Start AutoSampler program.

Fig 5. Example AutoSampler GUI screen.
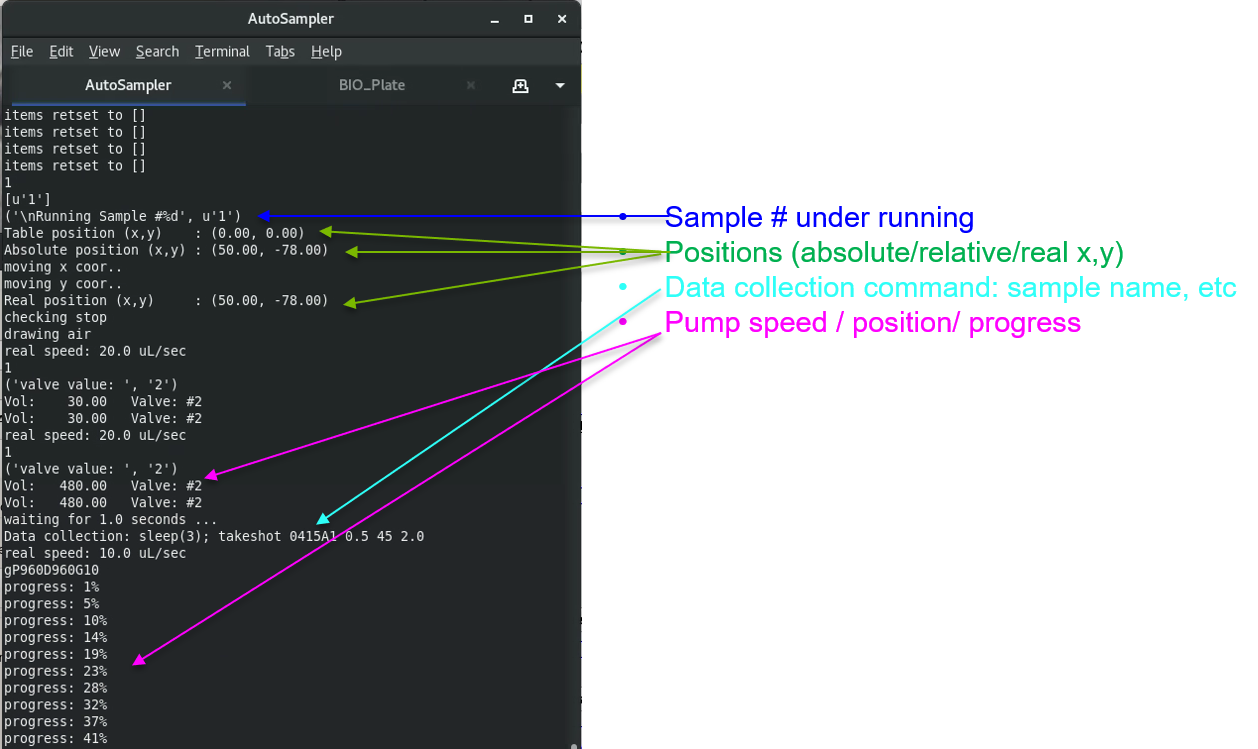
Fig 6. Example AutoSampler print out in the linx terminal.
2. Syringe Pump Setting and Operation
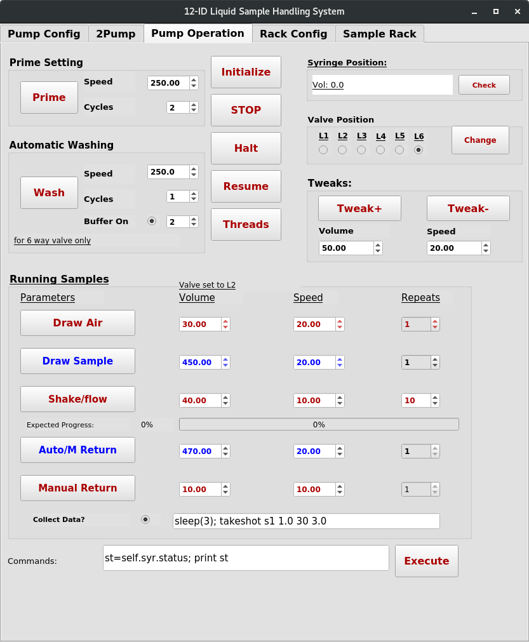
Fig 7. Syringe pump operations
Fig 7. Syringe pump operations (duplicate)
Parameters of Syringe Pump
Prime
Wash
Running Samples
Syringe/Valve Position
Tweaks
Commands: & Execute
3. Autosampler Needle and Rack Position Calibration
Only for staff and experienced users's operation

Figure 8. Rack and Needle configuration
Sample Rack Motor Operation
Cleaning Station Location
Plate Configuration
4. Autosampler Sample Operation
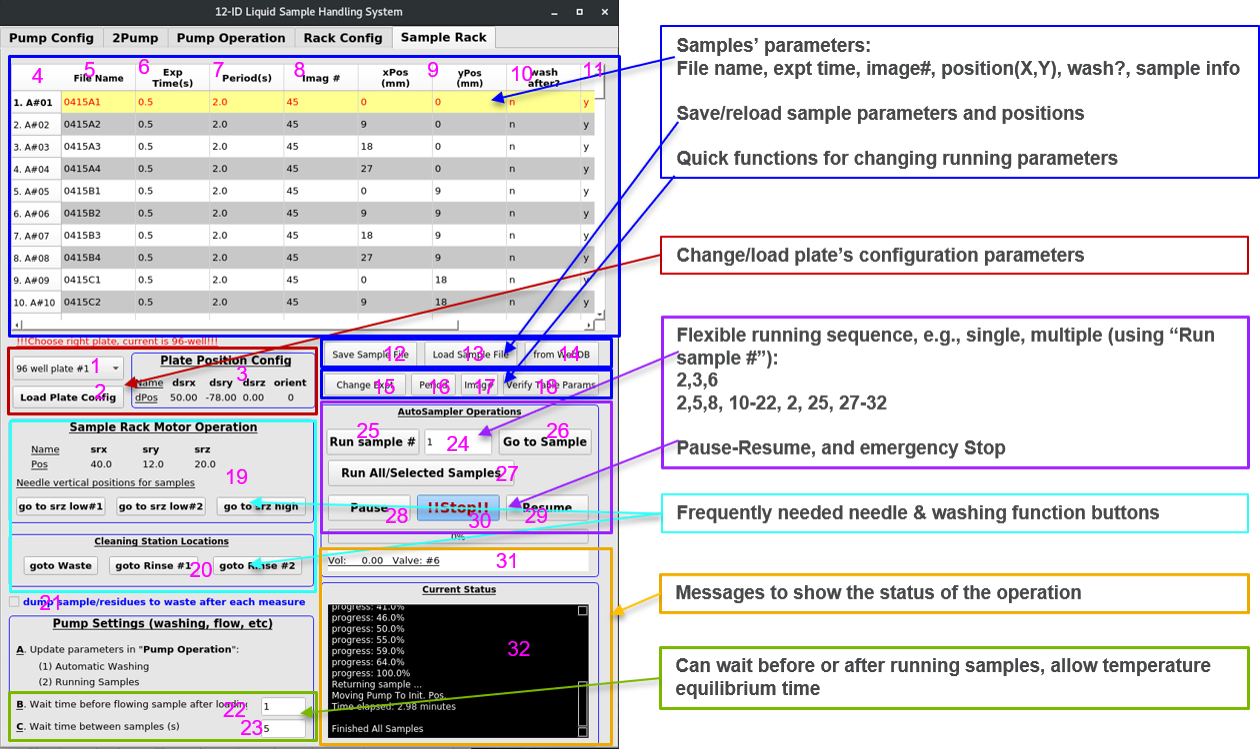
Fig 9. Sample Operations.
Load correct plate (1-3)
Sample Parameters (4-11)
Utility Functions on Sample Parameters(12-14)
Convienient Function Buttons (19-20)
Sample Operations(24-30)
Message on Autosampler Status (31-32)
Other Useful Functions (21-23)
Additional instruction videos available:
Fig 4. Start Autosamper.
Fig 7. Syringe pump operations (duplicate)
Fig 8. Syringe pump operations (duplicate)

Fig 9. Sample operations